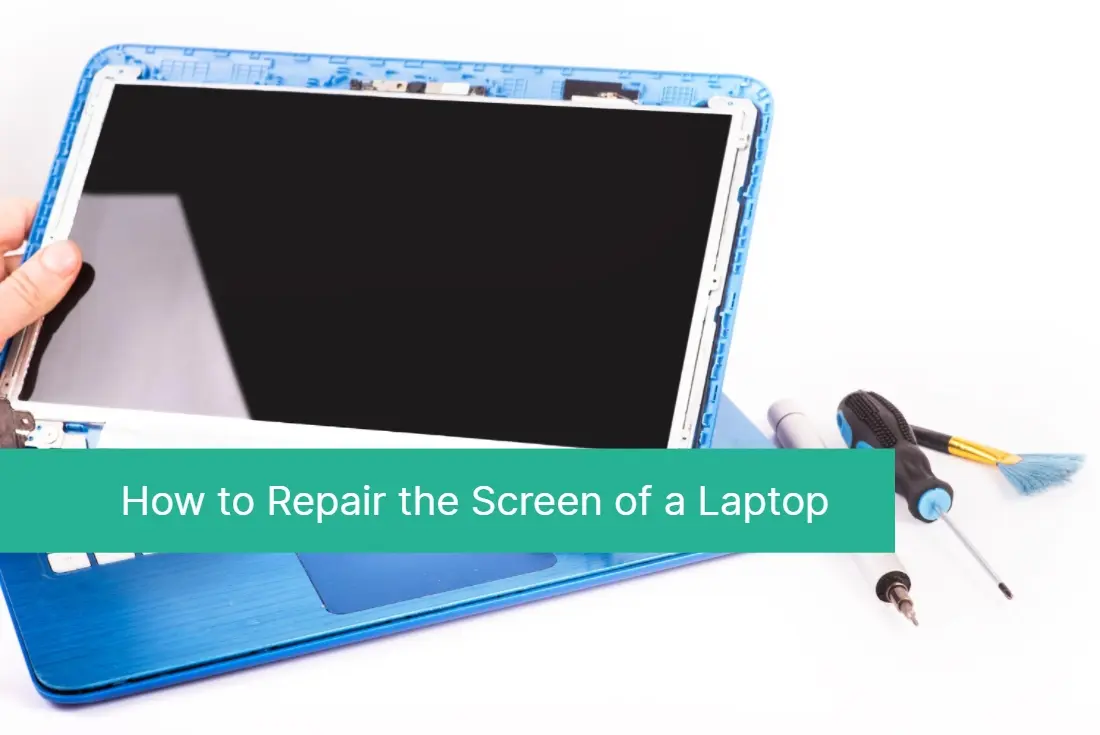
27 Jun Save Money and Time: Master the Art of Repairing Your Laptop Screen Like a Pro!
Save Money and Time: Master the Art of Repairing Your Laptop Screen Like a Pro! Are you tired of spending a fortune on laptop repairs? Do you wish you could fix your laptop screen with ease, saving both money and time? Look no further because we have the ultimate solution for you! In today’s fast-paced world, our laptops have become an integral part of our lives, and a cracked or broken screen can be a major setback. But fear not because with a little knowledge and the right tools, you can master the art of repairing your laptop screen like a pro! In this guide, we will walk you through the step-by-step process of fixing your laptop screen, saving you the hassle of expensive repairs and lengthy waiting times. So, grab your toolkit and get ready to embark on a journey of saving money, time, and becoming a true DIY laptop screen repair expert!
The Importance of Repairing Your Laptop Screen
Your laptop screen is the gateway to your digital world. It allows you to work, play, and connect with others. However, when your laptop screen is cracked or broken, it can hinder your productivity and even render your laptop unusable. That’s why it’s crucial to understand the importance of repairing your laptop screen promptly.
Firstly, a broken laptop screen can cause further damage to your device. When the screen is cracked, it becomes more vulnerable to dust, dirt, and moisture, which can seep into the internal components and cause permanent damage. By repairing your laptop screen, you can prevent these external factors from wreaking havoc on your device.
Secondly, a functioning laptop screen is essential for optimal user experience. Whether you’re working on a project, streaming a movie, or simply browsing the web, a clear and vibrant screen enhances your overall enjoyment and productivity. Repairing your laptop screen ensures that you can continue using your device without any visual hindrances.
Lastly, repairing your laptop screen can save you a significant amount of money. Professional laptop screen repairs can cost a fortune, and in some cases, the cost of repair might even exceed the value of the laptop itself. By learning how to repair your laptop screen, you can avoid these exorbitant expenses and allocate your hard-earned money elsewhere.
Common Laptop Screen Issues
Before we dive into the repair process, let’s familiarize ourselves with some common laptop screen issues. Understanding these issues will help you diagnose the problem and determine whether it can be fixed or if you need professional assistance.
Cracked Screen
A cracked laptop screen is one of the most common issues users face. It occurs when the screen gets physically damaged, resulting in visible cracks or shattered glass. A cracked screen can occur due to accidental drops, impacts, or even pressure applied to the screen.
Blank Screen
If your laptop screen remains black or displays no image when turned on, it could indicate a problem with the display itself or the connection between the screen and the motherboard. This issue can be caused by a faulty LCD panel, loose cables, or even a malfunctioning graphics card.
Flickering or Dim Screen
A flickering or dim laptop screen can be caused by various factors, including a faulty backlight, loose connections, or driver issues. This issue is characterized by intermittent brightness fluctuations or a screen that appears significantly darker than usual.
Stuck Pixels
Stuck pixels are individual pixels on the screen that remain a single color and fail to change. They can appear as bright dots or black spots, and they can be quite distracting when working or watching videos. Stuck pixels are typically caused by manufacturing defects or physical pressure on the screen.
Now that we’ve identified some common laptop screen issues, let’s move on to the tools and materials you’ll need for the repair process.
Don’t have the time or desire to repair your laptop’s screen yourself?
Our computer technicians are ready to carry out free diagnostics and replacement of the laptop screen within one day. Call us by phone (954) 524 9002 right now.
Tools and Materials Needed for Laptop Screen Repair
Repairing your laptop screen requires a few essential tools and materials. Here’s a list of what you’ll need to get started:
Screwdriver Set
A good quality screwdriver set with various sizes of Phillips and flathead screwdrivers is essential for removing screws and disassembling your laptop.
Pry Tools
These thin and flexible tools are used to pry open the bezel or frame of your laptop screen without causing any damage. Plastic pry tools or guitar picks work well for this purpose.
Anti-Static Wrist Strap
To protect your laptop from electrostatic discharge (ESD) damage, it’s crucial to wear an anti-static wrist strap while working on the internal components. This strap prevents the buildup of static electricity on your body, which could potentially harm sensitive circuitry.
Replacement Screen
Depending on the extent of the damage, you may need to replace your laptop screen entirely. Make sure to order a compatible replacement screen that matches your laptop’s make and model.
Microfiber Cloth
A microfiber cloth is an excellent tool for cleaning your laptop screen before and after the repair. It helps remove dust, fingerprints, and smudges without scratching the surface.
Tweezers
Tweezers are helpful for handling small screws, connectors, and other delicate components during the repair process.
Isopropyl Alcohol
Isopropyl alcohol is used to clean the connectors and adhesive residue on the laptop screen. It effectively removes dirt and prepares the surface for reassembly.
Now that you have all the necessary tools and materials, let’s move on to the step-by-step guide for repairing your laptop screen.
Step-by-Step Guide to Repairing Your Laptop Screen
1. Prepare Your Workspace
Before you begin, find a clean, well-lit, and static-free workspace. Clear the area and lay down a soft cloth or mat to protect your laptop and work surface from scratches.
2. Power Down and Disconnect
Shut down your laptop and unplug it from the power source. It’s important to disconnect any external devices and remove the battery if possible. This ensures your safety and prevents any accidental damage to your laptop during the repair process.
3. Remove the Bezel
Using a plastic pry tool or guitar pick, carefully pry open the bezel or frame around the laptop screen. Start at one corner and work your way around, gently releasing the plastic clips that hold the bezel in place. Be patient and apply even pressure to avoid cracking or damaging the bezel.
4. Disconnect the Display Cable
Once the bezel is removed, you’ll find a thin cable called the display cable or ribbon cable that connects the screen to the motherboard. Carefully disconnect this cable by gently pulling it out from its connector. Avoid using excessive force, as these connectors can be delicate.
5. Remove the Old Screen
With the display cable disconnected, you can now remove the old screen from the laptop. Locate the screws that secure the screen to the hinges and remove them using the appropriate screwdriver. Once the screws are removed, gently lift the screen from the hinges and set it aside.
6. Install the Replacement Screen
Take the new replacement screen and align it with the hinges. Secure it in place by tightening the screws. Make sure the screen is properly aligned and level with the laptop’s body.
7. Reconnect the Display Cable
Carefully reconnect the display cable to the new screen’s connector. Ensure it is securely attached and seated properly. Take your time to align the cable correctly, and avoid forcing it into place.
8. Reattach the Bezel
Place the bezel back onto the laptop and gently press it down to snap it into place. Start at one corner and work your way around, ensuring all the plastic clips are engaged. Once the bezel is secure, give it a gentle press to ensure it is flush with the laptop’s body.
9. Power Up and Test
Reconnect the power source and turn on your laptop. If everything is connected correctly, you should see the image on your new screen. Test the screen by opening various applications, displaying different colors, and checking for any abnormalities.
Congratulations! You’ve successfully repaired your laptop screen like a pro. However, to ensure you don’t encounter similar issues in the future, here are some tips for preventing laptop screen damage.
Tips for Preventing Laptop Screen Damage
Invest in a Protective Case
A sturdy laptop case or sleeve can provide an extra layer of protection against accidental drops or impacts. Look for cases specifically designed for your laptop’s make and model for a snug fit.
Handle with Care
Treat your laptop with care and avoid placing heavy objects on the keyboard or closing the lid forcefully. Gentle handling can go a long way in preventing screen damage.
Clean Regularly
Dust, dirt, and fingerprints can accumulate on your laptop screen over time, affecting its clarity and performance. Use a microfiber cloth to clean the screen regularly, and avoid using harsh cleaning agents that can damage the surface.
Avoid Liquid Exposure
Liquids can cause irreparable damage to your laptop screen. Keep drinks and other liquids away from your laptop, and be cautious when working near water or other potential spill hazards.
Use a Screen Protector
Applying a screen protector can add an extra layer of protection against scratches and minor impacts. Look for high-quality, anti-glare screen protectors for optimal visibility and screen protection.
By following these preventative measures, you can prolong the lifespan of your laptop screen and reduce the need for repairs.
Cost Comparison: DIY vs. Professional Laptop Screen Repair
Now that you’ve successfully repaired your laptop screen, you might be wondering how much money you saved compared to professional repair services. Let’s do a quick cost comparison to give you an idea of the potential savings.
Professional laptop screen repair costs can vary depending on the brand, model, and severity of the damage. On average, a laptop screen replacement by a professional can cost anywhere from $150 to $500 or more. This cost includes the price of the replacement screen, labor, and any additional service fees.
On the other hand, the cost of repairing your laptop screen yourself can be significantly lower. A replacement screen for popular laptop models can be found for as low as $50 to $100 online. By investing in a few essential tools and materials, you can repair your laptop screen for a fraction of the cost of professional repair services.
Keep in mind that the cost comparison may vary depending on your location, the availability of replacement parts, and your comfort level with DIY repairs. However, the potential savings are undeniable, making DIY laptop screen repair a cost-effective option for those willing to give it a try.
Resources for Learning Laptop Screen Repair
If you’re interested in delving deeper into the world of laptop screen repair there are various resources available to help you expand your knowledge and skills. Here are a few recommended resources:
1. Online Tutorials
YouTube and other video-sharing platforms are treasure troves of laptop screen repair tutorials. Many experienced technicians and DIY enthusiasts share their expertise, providing step-by-step guidance on specific laptop models and common issues.
2. Repair Forums and Communities
Joining online forums and communities dedicated to laptop repairs can provide you with valuable insights, troubleshooting tips, and support from fellow DIYers. Websites like iFixit and Tom’s Hardware have active communities that can help answer your questions and guide you through the repair process.
3. E-books and Guides
Several e-books and comprehensive repair guides are available for purchase or download. These resources cover a wide range of laptop repair topics, including screen replacement, troubleshooting, and component-level repairs. Look for reputable authors and reviews to ensure you’re getting reliable information.
4. Local Workshops and Classes
If you prefer hands-on learning and live in a larger city, you may be able to find local workshops or classes on laptop repairs. These sessions are typically conducted by experienced technicians who can teach you the intricacies of laptop screen repair and answer your questions in person.
Remember, learning laptop screen repair is a continuous process, and practice makes perfect. Start with simple repairs and gradually work your way up to more complex tasks. With time and experience, you’ll become a true expert in DIY laptop screen repairs.
Available Laptop Screen Repair Services
While DIY laptop screen repair can save you money and provide a sense of accomplishment, there may be instances where professional assistance is necessary. If you’re uncomfortable with performing repairs yourself or if your laptop is still under warranty, it’s best to seek reputable laptop screen repair services.
Many local computer repair shops offer laptop screen repair services. Research and read reviews to find a reliable and trustworthy service provider in your area. Additionally, authorized service centers for your laptop’s brand can provide professional repairs using genuine parts.
When choosing a repair service, consider factors such as cost, turnaround time, warranty, and customer reviews. It’s essential to select a service that meets your specific needs and offers peace of mind.
Troubleshooting Common Laptop Screen Repair Problems
During the laptop screen repair process, you may encounter a few challenges or unexpected issues. Here are some common problems and their potential solutions:
1. Loose or Damaged Cables
If your laptop screen remains blank or flickers after reassembly, it’s possible that the display cable wasn’t properly connected or got damaged during the repair. Carefully check the cable connections and ensure they are securely attached. If necessary, replace the cable with a new one.
2. Mismatched or Incompatible Screen
If the replacement screen doesn’t display any image or shows distorted visuals, it could indicate a compatibility issue. Ensure that the replacement screen matches your laptop’s make, model, and specifications. If you suspect an incompatibility, contact the seller or manufacturer for assistance.
3. Residual Adhesive or Dust
If you notice visible adhesive residue or dust particles trapped between the screen and the bezel after reassembly, disassemble the bezel again and clean the affected areas using isopropyl alcohol and a microfiber cloth. Ensure that the screen and bezel are clean and free from any debris before reassembling.
If you encounter any other issues or have concerns about the repair process, it’s advisable to seek professional assistance or consult online communities for expert advice.
Conclusion
Repairing your laptop screen doesn’t have to be an intimidating or expensive ordeal. By following this step-by-step guide, you can acquire the skills and confidence to fix your laptop screen like a pro. Not only will you save money and time, but you’ll also gain a sense of accomplishment and independence.
Remember, prevention is key to avoiding future laptop screen damage. Take proactive measures to protect your laptop, clean the screen regularly, and handle it with care. And if you ever need professional assistance or want to expand your DIY skills further.
If self-repair of a laptop screen did not bring results, or you find it difficult to do it yourself, then contact Downtown Computer Services for help and our computer technicians will repair the screen quickly and efficiently. Call us by phone (954) 524 9002 right now.
Check out other relevant news
- How Easy-to-Use Hacking Tools Are Fueling Cybercrime
- Cryptocurrency Security for Small Businesses: Protecting Your Wallet
- The Infostealer Epidemic: Protecting Your Business from the Latest Wave of Cyberattacks
- The Identity Crisis: How Compromised Credentials Can Cripple Your Business
- Beyond the Brick and Mortar: Building Your Online Storefront with Digital Marketing